
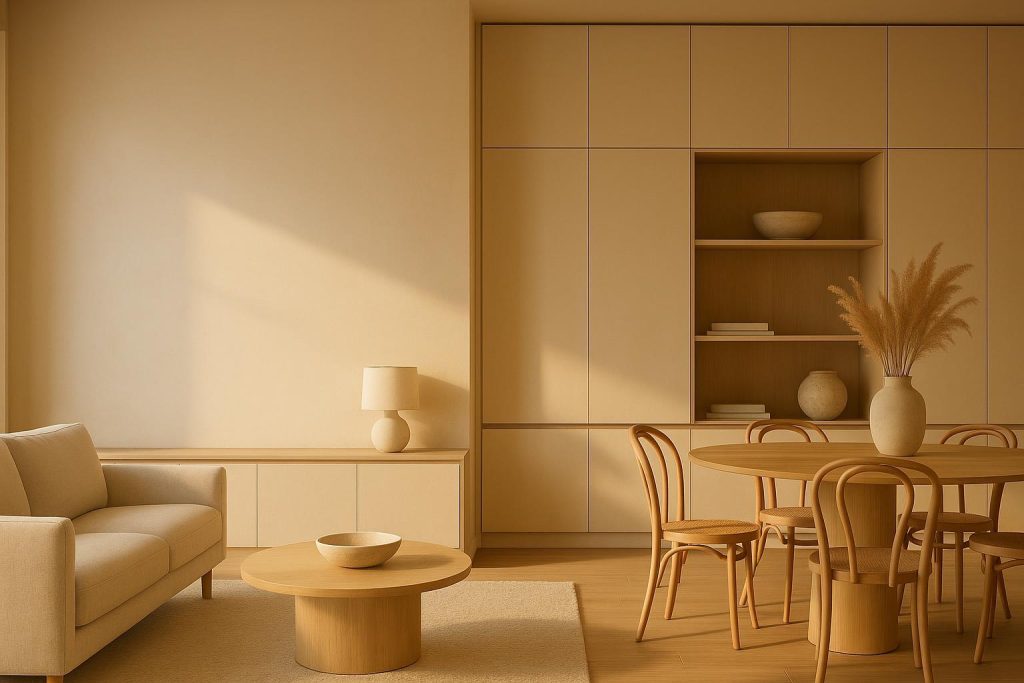
Design Strategies for an Open-Concept Living and Dining Area
Creating an open-concept living and dining area can be an exciting way to modernize and expand the feel of your home. There’s something truly appealing about walking into a bright, spacious layout where the kitchen, dining area, and living room flow into each other. Whether you’re looking to remove walls for a seamless experience or simply want to reimagine how your furniture is arranged, one concern often arises: How do you preserve or even enhance storage solutions in the process? Fortunately, with intentional planning, custom built-ins, and design-centered approaches, you can merge openness with functionality. In this guide, we’ll explore strategies to help you enjoy a wide-open space while still keeping clutter at bay, offering peace of mind that form and function can indeed coexist.
1. Laying the Foundation: Thoughtful Planning and Layout
Before any renovation begins, it’s wise to sit down and map out your goals for the new open space. Ask yourself what you truly need in the living and dining areas. Do you host large family gatherings often, requiring plenty of dining seating? Is the living area your go-to spot for relaxing movie nights or reading sessions? Clarifying these types of needs helps you prioritize which features are absolutely essential and which structural elements can be removed or combined without losing your sense of comfort or storage.
In many homes, existing load-bearing walls or partial walls separate the living and dining rooms. If you plan to remove them, you’ll want to consult with a structural expert, as beams or columns might need to replace those walls. This structural adaptation can still mesh well with storage solutions. For instance, you might incorporate a support column into a decorative post that also includes small built-in cubbies or shelving. By envisioning how each structural component can be transformed into an organizational unit, you gain storage without losing design integrity.
Additionally, consider the flow of movement. Creating a continuous path from the kitchen to the living area ensures that foot traffic won’t be hindered by furniture or disruptive design elements. The more efficiently people can walk through the space, the grander and more accessible it will feel. Pair this with a diligent inventory of the items you most frequently store—like dinnerware, linens, electronics, or games—to determine exactly where each should live in the new layout.
2. Maximizing Built-In Storage Along Perimeter Walls
Perimeter walls are prime real estate for storage in an open-concept design. Imagine a clean wall lined with discreet built-in cabinets or shelving that complements the rest of the interior style. This type of addition keeps the floor plan open and unencumbered, while still providing places to stow away items you don’t want crowding your surfaces.
If your open-concept space is relatively large, consider floor-to-ceiling storage around the edges. Built-in bookcases, for example, can help you display decorative pieces, family antiques, and books while still adding to the aesthetic appeal. Placing cupboard doors on lower shelves keeps small electronics, kids’ toys, or seasonal items neatly hidden. Meanwhile, the upper shelves can remain open for display. By mixing open shelving with closed storage, you achieve both style and practicality.
For tighter floor plans, think about narrow cabinets or sets of shallow shelving units that won’t protrude too far into the room. Even a slim, low-profile cabinet can hold plenty of dishes, board games, or remote controls. When painted or finished in a color that matches your walls, these pieces blend in seamlessly and won’t disrupt your airy, open vibe. If you want a more dramatic design statement, choose a contrasting finish for your built-ins so they become focal points in the space.
3. Exploring Multipurpose Furniture for Efficiency
Multipurpose furniture is an excellent investment for anyone looking to preserve open space while adding user-friendly storage. Living rooms can benefit from coffee tables with hidden compartments—ideal spots to store magazines, TV accessories, or blankets. An ottoman with a removable lid and internal storage also serves as a comfortable footrest and, in some cases, extra seating when guests arrive.
In the dining area, furniture that does double duty keeps clutter off your floors and countertops. Consider a dining bench with a hinged seat, which can house table linens, puzzles, or even spare seat cushions. Alternatively, sideboards or buffet-style cabinets with built-in drawers for utensils and platters allow you to serve meals conveniently while maintaining an uncluttered look. Selecting a dining table with extension leaves can also help accommodate larger gatherings, all while folding away neatly to preserve a more intimate dining space on quieter days.
Look for furniture that’s both design-centered and transparent in purpose. You’ll never regret investing in something you can use in multiple ways. The sense of continuity from living room to dining area sets the tone for the entire open concept. Every piece of furniture should feel like a harmonious extension of your lifestyle—offering comfort, style, and storage potential all in one.
4. Maintaining a Cohesive Design Aesthetic
One key principle in open-concept design is consistency across different functional zones. Since the living and dining spaces are visually connected, it’s crucial to maintain a unified style and color scheme. A cohesive aesthetic ensures the space doesn’t feel disjointed or haphazard. Simple visual ties like matching cabinet finishes, consistent flooring, and related hardware styles create a sense of flow.
Likewise, repeating accent colors subtly reshapes the entire room into one consistent aesthetic. If your dining chairs feature brass accents, you might incorporate a similar finish on your living room light fixture. Matching area rugs, complementary couch cushions, and decorative elements that share the same palette help unify the zones without sacrificing their individual personalities. In doing so, you encourage a sense of continuity while enhancing the open layout.
Further unify your space by selecting similar textures: for instance, choose coordinating wood tones for both living room shelving and dining room furniture. Alternatively, carry a color or wallpaper accent from one area to another. These mild but deliberate echoes of design integrate your furnishings into a single environment. This approach also expands the perception of space, making the area feel more open and inviting.
5. Leveraging the Kitchen Island for Extra Storage
In many open-concept homes, the kitchen looks directly onto the living or dining area, bridging these spaces through strategic design. Here, the kitchen island can become a vital spot for extra storage. Islands can be built with cabinets, drawers, or shelves on multiple sides, so that items used in the living or dining area—like tablecloths, games, or even a small bar setup—are easily accessible.
If you plan to host gatherings often, consider adding a secondary sink or mini-fridge to the island. Storing beverage supplies, glassware, and bar accessories within the island keeps them out of your primary kitchen cabinetry. This thoughtful addition prevents overcrowding in your main cooking space. You’ll also find it convenient for entertaining, since guests can help themselves to refreshments without obstructing the cook. This improved flow in your open concept fosters a welcoming atmosphere that’s perfect for conversation and socializing.
For even more convenience, think about installing pull-out shelves or rotating corner units in the island to fully maximize every inch of available space. Keep in mind that your kitchen island can also function as a boundary marker between the cooking and living areas—while sustaining visual openness—making it a practical, design-savvy solution for multifaceted storage needs.
6. Embracing Creative Storage Solutions and Unique Décor
If you’re worried that expanded shelving or built-ins might dominate your walls, consider using clever décor that doubles as storage. For instance, floating shelves offer a sleek silhouette while conveniently displaying accents like framed photos or vases. These shelves work beautifully in living rooms to highlight personal mementos while letting you tuck away smaller items in decorative baskets.
Another creative approach is to utilize ceiling space. High ceilings can accommodate suspended pot racks or pendant lighting with shelf-like attachments, primarily above the kitchen island. While this does not suit every aesthetic, it can offer a unique, modern look that also adds storage for frequently used cookware.
If you have a staircase near your living or dining area, consider converting the space underneath it into a built-in cabinet system. Alternatively, use it to install a compact home office nook complete with shelving, so it’s tucked away but still accessible. With some imagination, even awkward corners transform into functional design moments.
7. Overcoming Smaller Space Constraints
When you work within a limited footprint, every square inch counts. If you’re opening up a petite living and dining area, consider less imposing furniture and designs. For example, swap out a large sofa for a loveseat or sectional designed to fit snugly in a corner. Use transparent materials like glass or acrylic for tables or bar stools, which help preserve a sense of openness.
Additionally, choose a minimalist color palette to keep the space looking bright and airy. Neutral hues (like soft grays, warm whites, or light beiges) reflect natural light better and make the entire layout feel more expansive. The magic is in balancing the brighter backdrop with splashes of color in accent pillows, artwork, or decorative pieces. This ensures the room still feels dynamic and personalized despite its reduced size.
8. Matching Storage Solutions with Your Lifestyle
Every household is different, and what works for a busy family of five may not perfectly align with the needs of a couple or a single homeowner. As you design an open-concept living and dining area, tailor your storage solutions to your everyday routines. If you love to host dinner parties, dedicate more space to storing large platters, plates, and your best table linens. If you have children, consider easy-to-reach bins or baskets that encourage younger family members to help with clean-up and organization.
Meanwhile, for those who value a clean, minimalist aesthetic, built-in cabinets along the perimeter can hide almost all visual clutter. This design-centered approach ensures that only a handful of curated items remain visible, giving your home a streamlined look. If transparency is your preference—showcasing everything in a gallery-like style—incorporate open shelving with statement lighting. In either scenario, customizing your storage allows you to seamlessly blend personal needs with the architectural possibilities of open-concept layouts.
9. Finishing Touches: Lighting, Decor, and Color Palette
Although storage is often top-of-mind, don’t neglect the overall ambiance of your new layout. Lighting plays a key role. Well-placed recessed lights, hanging pendants over the dining table, and strategically located floor lamps keep the environment cozy and inviting while further helping unify the living and dining zones. Ensure each space has a mix of ambient and task lighting, particularly if you plan to read, work, or dine at various times of day.
When selecting decor, keep your open-concept aesthetic in mind. Oversized rugs can help define individual “areas” while still keeping the overall space connected. Place a living room rug around the main seating arrangement, and another under the dining table to subtly signal distinct purposes within a shared environment. Meanwhile, unify these areas by selecting rugs in complementary patterns or color schemes.
Finally, color coordination brings everything together. While neutrals maintain a bright, spacious feel, don’t be afraid to introduce accent walls or wallpaper. Just ensure the accent is repeated in small touches elsewhere to avoid visual fragmentation. The key is striking a balance between personal creativity and cohesive style. When you get the blend right, your open-concept living and dining area will provide both the breadth of space you crave and the strategically hidden storage you need.
10. Bringing It All Together and Next Steps
At its core, an open-concept living and dining area fosters greater connectivity—whether it’s connecting with family members, hosting friends, or simply maximizing your own personal ease of movement. While preserving essential storage can be a challenge, that challenge is met by blending thoughtful planning with well-placed built-ins, multipurpose furniture, and design choices that unify the space. By considering how you use your home on a daily basis, you can tailor every architectural tweak and décor decision to suit your lifestyle. The result? A home that feels larger, brighter, and wholeheartedly welcoming, even as it keeps things neatly tucked away.
If you’re searching for additional inspiration or looking to begin a seamless renovation project of your own, you might consider speaking with an experienced professional for personalized guidance. A dedicated renovation team can help you translate your open-concept vision into a reality through custom, quality craftsmanship. Whether you’re ready for a slight refresh or a major reconstruction, prioritizing innovative, tailored solutions ensures you don’t sacrifice precious storage in the pursuit of a contemporary floor plan. If you’d like to explore more about the renovation process, visit Home for ideas, tips, and next steps on transforming your living spaces. With the right approach, you can achieve a design-centered, open layout that maintains trust in functionality, fosters peace of mind, and celebrates the best of modern living.